
Are you passionate about indoor photography but find yourself frustrated by the presence of shadows in your images? Shadows can often detract from the overall quality of a photograph, obscuring important details and creating an unappealing visual effect. However, with the right techniques and considerations, you can effectively minimize or eliminate shadows in your indoor photography. In this article, we will explore various tips and tricks on How to Avoid Shadows in Indoor Photography to help you achieve shadow-free results and capture stunning images in any indoor setting.
There are three ways to light your indoor photos. First, you can use the ambient light that’s inside the room. Second, you can use an artificial light source to work as your key light. And three, you can use both ambient and artificial light and combine them to produce the best results. There are inherent problems no matter the source of light that you use. In this discussion, we shall look at each of these light sources and the issues they may pose and then figure out the solutions to overcome those problems.
This article is aimed at any beginner photographer looking to shoot photos in an indoor setting. It’s also aimed at photographers struggling with the proper exposure for indoor shots. But above all, this article is aimed at photographers struggling with the problem of shadows common in indoor photography.
You may enjoy reading What is ISO in photography
Understanding the Impact of Shadows in Indoor Photography
Shadows can significantly impact the overall mood, composition, and clarity of your indoor photographs. They can create distractions, obscure important details, and diminish the overall visual appeal of your images. By understanding the impact of shadows, you can take proactive steps to minimize their presence and enhance the quality of your indoor photography.
Shooting indoors using natural light has a few problems.
Shooting indoors without artificial lights is a challenge for a few reasons. First, without artificial lights, you’re forced to use the ambient light in the scene, which is significantly less. Therefore, there is a risk of underexposed photos with dark shadows. To compensate, photographers often use a higher ISO. But a higher ISO poses its own problems. Many camera systems suffer from reduced dynamic range in low light situations, especially at higher ISO. The resulting images are grainy and without contrast and poor color rendition.
Suppose you’re shooting with a modern DSLR, a mirrorless camera with superior low-light performance, or any camera with an ISO invariant sensor. In that case, you can still shoot amazing images indoors without the associated noise and lack of dynamic range.
However, shooting with older cameras, especially point-and-shoot ones, can cause image noise and a lack of dynamic range.
Shooting indoors and in cramped spaces results in other problems – unwanted shadows in the photos. We often inadvertently click a picture of a subject standing close to a wall. The proximity to the wall produces harsh shadows.
But don’t worry, there is always a way to counter these problems.
You may enjoy reading Best Cameras for Sports Photography Beginners
How to avoid dark shadows in your indoor photos?
So, how do you avoid capturing those unwanted shadows in your photos? Here are a few tricks that you can use.
Use a large window

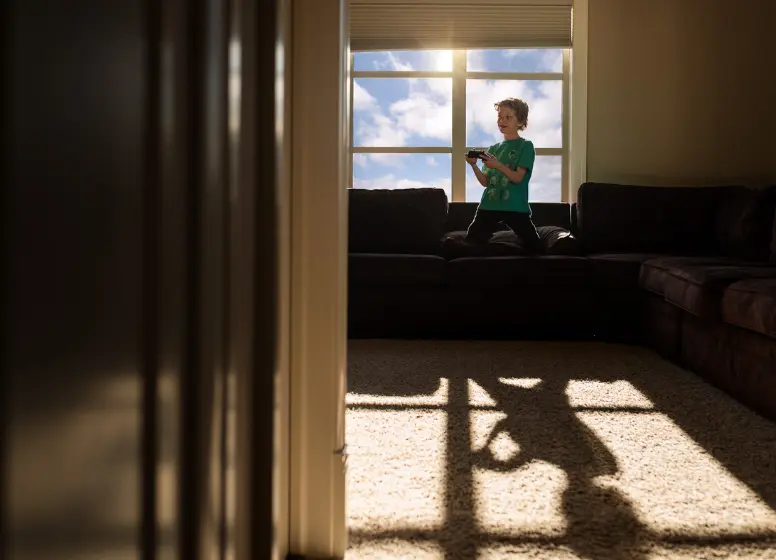
Every home has that, i.e., a large window with abundant light coming through it. A large window that gets a lot of sunshine on a sunny day is excellent for different kinds of indoor photography. Even better if the sunlight isn’t direct because the light is diffused and softer. But if it gets direct sunlight (source of hard light), you can use a diffusing material to soften the quality of light. The best way is to use a white sheet, a translucent paper roll, or a diffuser/reflector is the best option to soften the light source.
Once you have selected the source of light, i.e., window light, you can place your subject close to the window. Putting an issue close to the source of light makes the light source more prominent and, therefore, the light softer. It, in turn, removes any shadows.
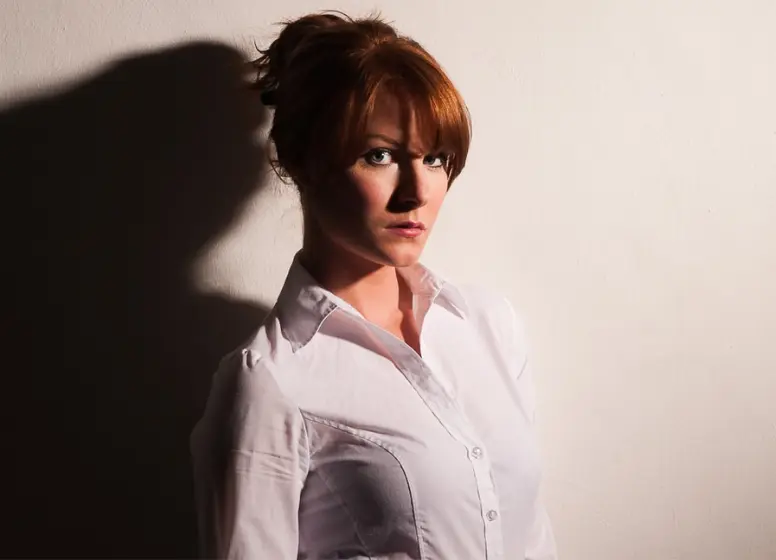
However, there is only one caveat, and that’s light fall-off. Especially if the subject is standing against a wall or a backdrop, the closer the subject is to the light source, the more dramatic the light fall off would be. If there is a wall or a backdrop behind the subject, that light fall-off will result in harsh shadows.
Utilizing Natural Light to Your Advantage
When it comes to indoor photography, utilizing natural light can be a game-changer. Position your subject near windows or open doors to take advantage of the soft, diffused light that enters the room. By harnessing natural light sources, you can create a more balanced and flattering illumination, reducing the occurrence of harsh shadows in your images.
Employing Artificial Lighting Techniques
In situations where natural light is insufficient or unavailable, artificial lighting becomes essential. Invest in a reliable and adjustable lighting setup that allows you to control the intensity and direction of light. By strategically placing artificial light sources, such as studio strobes or continuous lights, you can minimize shadows and achieve a well-lit indoor environment for your photography.
Using Reflectors to Reduce Shadows
Reflectors are invaluable tools for manipulating light and reducing shadows in indoor photography. These reflective surfaces can bounce light back onto the subject, effectively filling in shadows and creating a more even lighting distribution. Experiment with different reflector sizes and materials to achieve the desired level of shadow reduction and highlight detail in your indoor images.
Controlling Shadows with Diffusers
Diffusers are excellent accessories that help soften and distribute light more evenly, minimizing shadows in the process. Attach a diffuser to your artificial light source or place it between the light source and the subject to scatter the light and create a gentle illumination. Diffusers come in various forms, such as softboxes or umbrellas, offering versatile options for shadow control in indoor photography.
Positioning and Angles: Key Considerations

The position and angles at which you shoot can greatly influence the presence and intensity of shadows in your indoor photographs. Experiment with different shooting positions, perspectives, and angles to find the most flattering composition and lighting scenario. By adjusting your position and shooting angle, you can effectively minimize or eliminate unwanted shadows, resulting in more captivating indoor images.
Post-Processing Techniques to Minimize Shadows
Post-processing software provides a wide array of tools and features to refine your indoor photographs and minimize the impact of shadows. Utilize techniques like dodging and burning to selectively lighten or darken specific areas, reducing the prominence of shadows. Experiment with different editing tools to achieve the desired level of shadow reduction while maintaining a natural and balanced appearance in your final images.
You may enjoy reading Top Floral photoshoot ideas in 2023
Make sure to increase the distance between any wall or backdrop and the subject
This brings us to the second method to avoid unflattering shadows in the frame. As we have seen above, if you keep the subject close to a backdrop or wall, harsh shadows form at the back of the subject. To avoid this, keep some distance between the subject and the background (wall/backdrop).
All you’ve to do is ask the subject to take a couple of steps forward, immediately eliminating the shadows in the background.
Play with the depth of field of your images to obliterate the shadow in the background

This does not take care of the shadow in the sense that this does not eliminate the shadow in the background. But when you use a shallow depth of field, you can blur out anything in the background. Even if there is a shadow in the background, it becomes less obvious and therefore less obstructing in the long run.
You need to use a wide aperture setting on your camera to achieve this effect. Your lens will have the numbers f/4 or f/3.5 or f/1.8 or something in those lines written on the body of the lens. These numbers or fractions denote the widest aperture possible on the lens. If there are two such numbers, your lens is a zoom lens, and the two numbers or fractions denote the maximum aperture possible at the widest angle and the most extended zoom.
Change the angle of the light
Sometimes the angle of the light is the principal reason why your photos have distracting background shadows in a situation like that; changing the angle of the light and help you to overcome this.
For example, when the light is at 30 or 35 degrees from where the subject stands, you can see a shadow forming behind the subject. Changing the angle of the light and bringing it closer to 90 degrees can help you to overcome the problem.
Along with the angle of the light, you also have to consider the height of the light. The higher the position of the light in relation to the subject, the lower the shadow’s position. Suppose the light is close to where the eyes of the subject are. In that case, the shadow will be right behind the subject and visible to the camera. If, however, the light is raised so that it is above the eye line, or even higher than that, the shadow will be lower than what the camera is able to catch.
Shoot during the golden hour of the day
Golden hour suggests the time of the day when the sun is close to the horizon and the light turns golden yellow. Photographers consider this the best time of the day to shoot portrait photography. But beyond portraits, you can also use this light to shoot a bunch of other photography genres like product photography. This is the time of the day when the sun’s rays travel parallel to the earth’s surface; therefore, there are few unwanted shadows. The light is flatteringly perfect for portrait photography.
There is but one problem: you must be outside or in a place where you can use the golden light. If your house has a terrace, a large window, a balcony, or a window that opens to the west, you can take advantage of this light.
Use a fill light source to eliminate shadows

Sometimes it’s impossible to eliminate unwanted shadows from the background. Sometimes those shadows are on the subject’s face itself. The reasons could be not much space to maneuver, or impossible to change the angle of light or the source of light (window), etc. No matter what the issue is, there is one solution. The solution is to use a fill light source.
As the name suggests, a fill light is a light source that fills in the shadows. Fill light is a type of artificial light source. However, you can also use a reflector as a fill light. We’ll show you how to do that.
But first, let’s understand how to use an artificial light source as a fill light. You can take a studio strobe and lower the power output to produce a fill light. Alternatively, you can take a Speedlite, manually reduce the power output and use that as a fill light source.
A question may arise at this juncture as to why I’m suggesting manually changing the power settings on the speed light, especially when most cameras and flashes sync with themselves using the TTL method. The reason is there is no hard and fast formula for the power output of the fill light. Usually, the fill light is set at half the power output of the key light. You do not want to obliterate all the shadows because that will eliminate dimension from your image.
At some later time, we will discuss camera settings for studio portrait shoots, wherein we will further discuss the use of manual mode and the correct use of camera flash.
Remember, photography is essentially a two-dimensional representation of a three-dimensional subject. Photographers use shadows as a way to reproduce the three-dimensional aspects of a two-dimensional medium.
If both the lights (key light and the fill light) have an equal power ratio, it will eliminate the shadows and, with it, the effects of dimension.
You may enjoy reading Best Lens for Nature Photography
What kind of lights can be used as fill lights?

First thing is there are no hard and fast rules regarding the kind of light necessary to be used as a fill light source. You can practically use any kind of light, including a ring light and those tiny cube lights that you can hand hold or set up on a tripod to fill in the shadows.
Pro tip – The main thing is that the fill light must be set up opposite the key light.
You may ask, at this juncture, what is the “key light?”
Well, the key light is the primary light source. It is the main light source that illuminates the subject. It can be a natural lighting or an artificial source. You can use the natural light coming through a window as the key light. Alternatively, you can set up a continuous light to perform the role of a key light source.
When a key light source illuminates an object, the side facing away from the key light is in the shadows. This is the reason why the fill light is always placed in the direction opposite to the key light. Depending on the kind of result that you need, a fill light is utilized to fill in the shadows.
There are many different ways to use a single light source, especially in a portrait photography setup. We will discuss those in a later discussion.
Use a background light
The purpose of fill light is to fill in the shadows on the subject’s face and produce sharp images. They have nothing to do with the shadows formed in the subject’s background. We use fill lights to compensate for the shadows created by the key light. But what about the background? Especially when the subject has no place to maneuver and using a large aperture is also out of the question?
The answer is to use a background light. The purpose of the background light is to illuminate the subject’s background. There is more than one way of using a background light. You can aim the background light towards the subject’s head and create what is known as rim lighting in photography. We’re not going to discuss in detail about rim lighting because it is outside the purview of this discussion.
The purpose for which we will use background lights is to eliminate the soft shadows behind the subject. As you can see here, using artificial light sources has its challenges. The common problem is that a single light source is a great way to start an indoor setup, but it also throws some problems. Depending on the lighting conditions, we need additional light sources to ensure the shadows are eliminated. All this is part of a larger subject of using artificial lighting in the studio. We will discuss these when we talk about studio portraits and flash photography.
You may enjoy reading Best ISO Setting for Low-Light Photography
What if you don’t have a background light?
Many photographers shooting with artificial lighting and in an indoor situation may not have a second light source to be used as the background light or as a fill light. How to handle a situation such as that?
There are two ways in which you can handle a situation like that. Let’s say you have a single light and nothing else to work as the fill light source. What you can do is you can use a silver reflector to work as the fill light source. Invest in one of those five-in-one reflectors. They come with a shiny silver side, which can work as your fill light source by reflecting the light coming in from the key light source.
The second solution is to use the key light by positioning it at a higher angle relative to the subject’s face. The light should be placed at approximately 45 degrees and about four feet from the subject’s face. This will do two things. First, the light coverage area will increase, giving the background some light. Secondly, as the subject is further away from the light source, light fall-off would be less.
The Importance of Practice and Experimentation
Mastering the art of shadow-free indoor photography requires practice, patience, and a willingness to experiment with different techniques. Every indoor setting presents unique lighting challenges, and by actively practicing and exploring various approaches, you can refine your skills and develop an intuitive understanding of how to avoid shadows effectively.
Showcasing Your Shadow-Free Indoor Photography
Once you have mastered the techniques to avoid shadows in your indoor photography, it’s time to showcase your talent. Share your stunning shadow-free images on social media platforms, photography forums, or even consider organizing an exhibition. Let your creativity shine through and inspire others with your captivating indoor photographs.
Frequently Asked Questions
How can I reduce harsh shadows when photographing indoors?
To reduce harsh shadows indoors, you can utilize natural light near windows or doors, employ artificial lighting techniques, use reflectors to bounce light, and experiment with diffusers to soften the illumination.
Can post-processing software help eliminate shadows in indoor photography?
Yes, post-processing software provides tools like dodging and burning that can selectively lighten or darken areas, reducing the prominence of shadows in indoor photographs.
Are there any specific camera settings that can help minimize shadows indoors?
While specific camera settings may vary based on the lighting conditions and equipment used, adjusting the exposure compensation and white balance can help minimize shadows and achieve more balanced indoor photographs.
What are some common mistakes to avoid when trying to avoid shadows in indoor photography?
Common mistakes to avoid include positioning the subject too close to a wall, using direct and harsh lighting without modifiers, and neglecting to experiment with different shooting angles and perspectives.
Are there any recommended resources or workshops to learn more about indoor photography techniques?
Yes, there are various online resources, photography forums, and workshops where you can learn more about indoor photography techniques, lighting setups, and shadow control. Engaging with the photography community and learning from experienced photographers can greatly enhance your skills.
Conclusion
Shadows in indoor photography can be frustrating, but with the right techniques and knowledge, they can be effectively minimized or eliminated. By understanding the impact of shadows, utilizing natural and artificial lighting techniques, and experimenting with different tools and perspectives, you can capture shadow-free indoor photographs that truly stand out. Remember to practice, be patient, and let your creativity guide you as you embark on your journey to master the art of indoor photography.
Moreover, you can also read a guide of Beginner Tips for Macro Photography
Comments are closed.