
Introduction
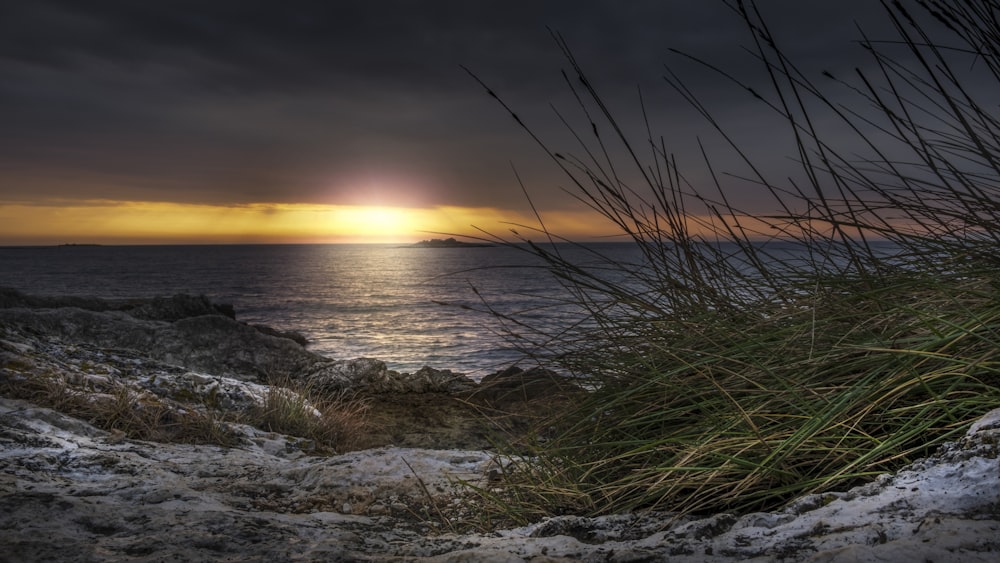
In the world of photography, capturing captivating images in low light conditions can present a unique challenge for both amateur enthusiasts and professional photographers alike. I know I have sat for many hours at the end of the day or first thing in the morning, waiting for the perfect light to take my shot.
The ability to manipulate light effectively and preserve image quality becomes important in such situations. ISO settings play a vital role in determining the outcome of low-light photography. Understanding the impact of ISO on image quality and knowing how to optimize its usage can make a significant difference in capturing stunning low-light photographs.
In this article, we’ll explore the best ISO settings to achieve the best results in challenging lighting scenarios. We will unravel the intricacies of ISO, its relationship with other exposure parameters, and how to strike the perfect balance between light sensitivity and image noise. Whether you’re an experienced photographer seeking to enhance your skills or a newbie keen to learn the art of low-light photography, this guide will equip you with the knowledge needed to master ISO settings and unlock the full potential of your camera.
So, get your camera and join us on this enlightening journey (Ed: poor joke sorry!) to unearth the secrets behind the best ISO setting for low light photography.
Key Takeaways
- To understand the impact ISO has on our photos.
- Understand the relationship between ISO and low-light photography.
- Techniques to reduce noise when shooting images.
- When to break the rule of low ISO shooting?
- How to eliminate noise from your photos using post-processing
Understanding the definition of ISO in photography
The acronym ISO has much wider ramifications than just the world of photography. The full term stands for International Organization for Standardization. The organization is entrusted to make standards across a plethora of disciplines in manufacturing and technology.
But when it comes to photography, the term is used to describe the low-light capabilities of a camera. Specifically, it tells how sensitive a camera is to light at a given ISO setting.
ISO settings are always expressed in whole numbers. A typical ISO number is 100 – which signifies the “base setting” of most cameras. This is the setting at which a camera is least sensitive to light.
It must be clarified here that ISO settings do not affect the amount of light a camera captures. In other words, the ISO setting does not control the exposure. However, ISO is frequently considered to be a part of the holy trinity of photographic exposure, together with – shutter speed and aperture. ISO deals with what happens after the camera captures the light.
The base ISO I have referred to above starts at 100. But after that, as you go up the chart, doubling the ISO number doubles the sensitivity of the sensor to light. So, the amount of light you need at ISO 200 (sensitivity double ISO 100) is half what you need at ISO 100.
However, the other exposure parameters – aperture and shutter speed- should remain the same when you try this.
What is the meaning of low ISO?
You will often hear about the term low ISO in your interactions with other photographers. The term ostensibly refers to a low ISO setting or a low sensitivity setting on your camera. You can typically relate a smaller number to low ISO. But in reality, it’s more of a relative thing. ISO 100 is a low number when you compare that to ISO 800. But when you compare ISO 800 to ISO 2000, the former is a low ISO number.
But to avoid confusion, if your camera shoots at an ISO range of 100-25600, then ISO 400 and anything below that can be considered a low ISO number.
There are many benefits of shooting with a low ISO number, as we’ll see later in this discussion.
The impact of low ISO on your photos
The single greatest benefit of shooting with a low ISO number is that you can resist the chances of your images having noise in them. While a little bit of noise is present in every photo, which only worsens when your ISO number goes up, you can ensure that your images are less affected by noise if you keep a low ISO number.
There are, however, some side effects of a low ISO number. Some good and some bad. Let’s quickly look through those for a change –
- A low ISO number means your camera/sensor is less sensitive to light. That means when you shoot, your camera is going to need a lot more light to make proper exposure as opposed to when you’re shooting with a high ISO number.
- Low ISO means low sensitivity to light, and that means an additional amount of light for proper exposure. What it entails is that the exposure time has to be increased. In other words, the shutter speed has to be slowed so that the camera gets enough time to capture light over time. That can result in image blur if you’re not careful.
- Low ISO will require that you bring in additional accessories like a tripod to shoot with. As the exposure time frame increases, it becomes impossible to hand-hold a camera fitted with a lens and steady it over a long exposure period.
- Low ISO number also improves the dynamic range of your photos. Especially photos that have been taken under low light and without any assistance from an external light source. This is because, with low ISO, there is less noise. The higher the amount of noise in your pictures lower the dynamic range.
- A camera with a low noise threshold also benefits from its ability to capture a larger dynamic range. Meaning you can expose your highlights and not worry about the shadows – which you can push later during post-processing. You can do that because the camera is able to capture a lot of dynamic range in the first place.
Camera capabilities and low-light performance
One of the key aspects that govern the low light performance of a camera is the capabilities of the sensor that powers that camera. In general, sensors that are smaller perform adversely than larger sensors. Also, with the sensor’s real estate staying the same, the more pixels you pack on it, the worse the sensor’s low light performance will be.
As mentioned above, some cameras come with a very low noise threshold. With these cameras, you don’t add much noise to the images to start off.
Then again, some camera systems come with what is known as a dual output gain. In these cameras, two different levels of amplification are used. A higher amplification is used when the shoot is conducted in a low light condition. On the other hand, when the shoot is conducted in a bright lighting condition, a low gain is used.
The camera automatically decides when to use the appropriate gain for the shooting condition and the ISO number you dial for the exposure.
With these cameras, the advantage is that your dynamic range is always retained in all kinds of lighting. But the greatest advantage is achieved when you’re shooting in low-light conditions. The higher gain ensures a lower amount of noise and, resultantly, a higher dynamic range.
ISO invariance is a term that you will often hear about in relation to low-light photography. I will discuss ISO invariance in the following section.
What is the best use case for low ISO in photography?
There are many instances when a low ISO is the preferred way to go. Let’s take a few examples to understand this.
Let’s say that you’re shooting on a bright day. You’ve set up your camera for a portrait shot. Naturally, you would be using a fast aperture lens that’s set to a wide-open aperture. With a wide-open aperture, the lens can let a lot of light into the camera. Meaning you don’t need to boost the ISO number to a higher value. You risk clipping your highlights if you set your camera to a higher ISO value.
Let’s take another example. Let’s say you’re set up to photograph a long shot of a waterfall. It’s moderately overcast, but in order to make a long exposure, that lighting is more than enough. As a matter of fact, you need to use an ND filter to ensure that your exposure is just right and does not clip the highlights. In a situation like that, you must ensure that your ISO settings are at their lowest.
When you’re using artificial lights to illuminate a scene – a well-lit interior architecture shot, a studio portrait, a product shot, etc. For shots like these, you need to ensure that your ISO setting is at the lowest. Using a higher ISO setting can push the exposure higher and result in highlight clipping.
Another reason you would want to use a low ISO number is when your camera is ISO invariant. Now, ISO invariance is a highly technical topic and deserves a separate discussion of its own where I can cover all aspects of it. In very brief, ISO invariance is said to be the capability of a camera sensor not to add any extra amount of noise. That allows the photographer to shoot with a low ISO, to the point of underexposing the scene and then pushing the exposure during post-processing.
This is obviously done for the sake of preserving details in the highlights.

Exceptions to the rule
Not always do you need to shoot with the lowest ISO number for shooting low-light photography. There are exceptions to that rule. And one major exception that I can think of is astrophotography.
Many of you budding low-light and astrophotography photographers will find the requirements for astrophotography slightly different from what you would normally expect for shooting in low-light conditions.
There are a number of parameters for shooting astrophotography, but one of those parameters includes shooting with a high ISO number. This is because as photographers have to make a sharp image of the sky in the shortest possible time frame.
If they drag the shutter (use a long exposure), the earth’s rotation comes into play. The result is star trails. While I love shooting star trails, they look mesmerizing, I don’t think anyone would like to do that unintentionally.
Another important place to use a very high ISO number is when you’re shooting fast-moving subjects, such as a wild animal, a bird, an athlete, or a moving vehicle. You need to use the fastest shutter speed that can freeze the movement of the subject without inducing too much noise into the image.
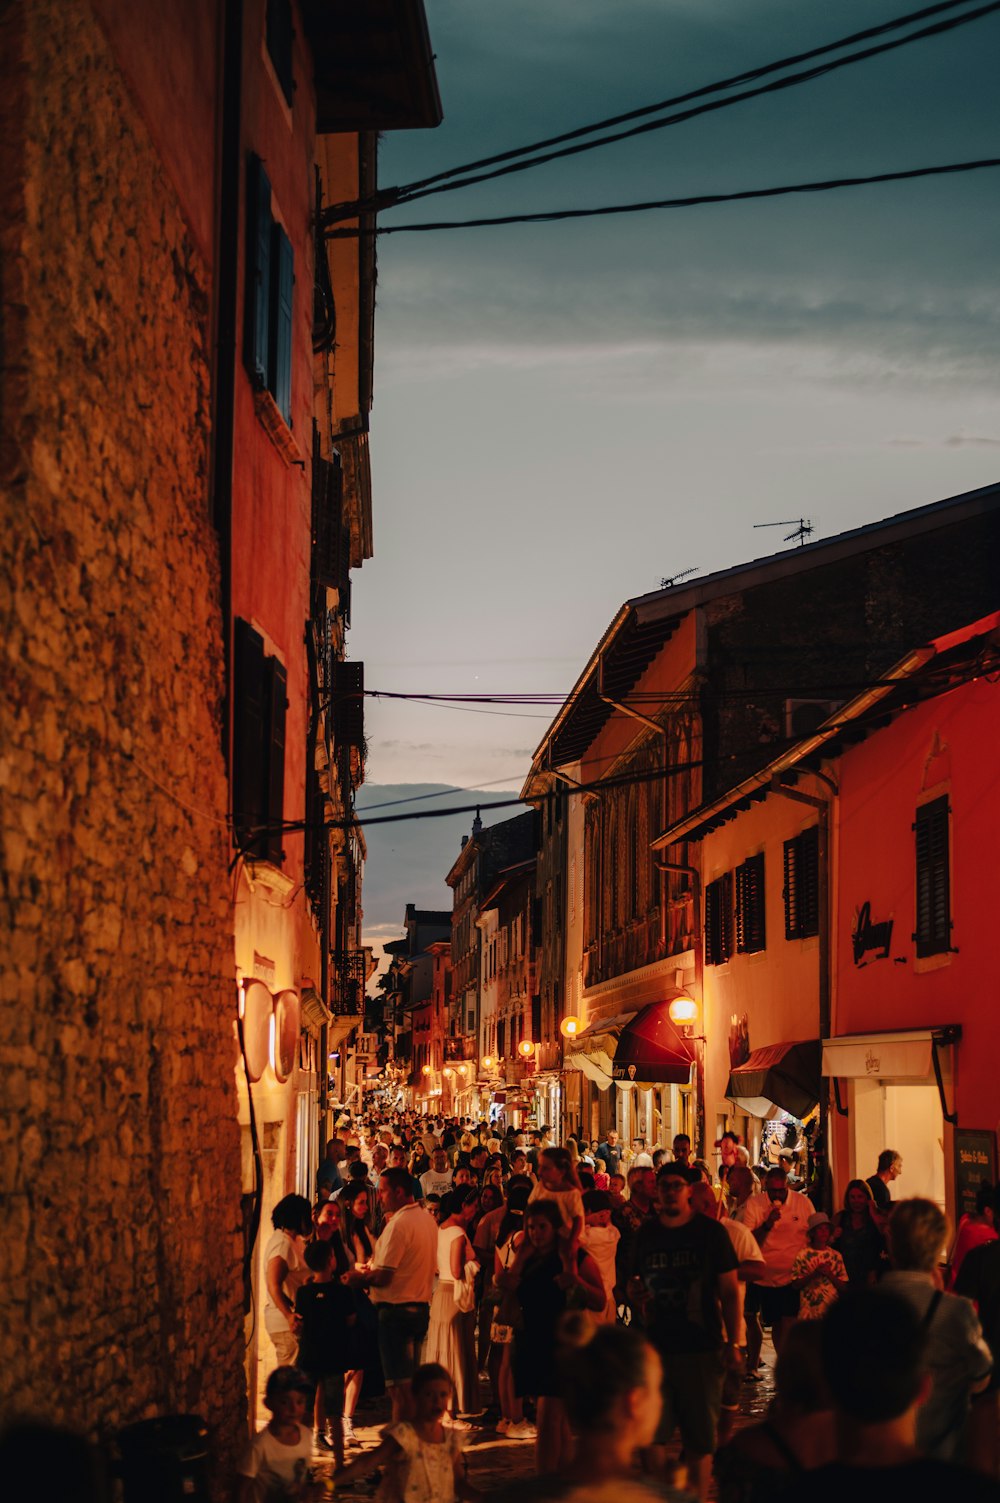
What is the best ISO to use when shooting at night?
This will depend on a few things. By now, you have realized that high ISO results in more noise, and low ISO results in less noise. However, shooting with a high ISO becomes imperative in certain situations because the ambient light isn’t high enough to produce a well-exposed image. Every camera has what is known as a sweet spot where the ISO produces the best-balanced performance – a balance between noise and detail.
As a photographer, you’ve to figure out where that balance is. That will be the highest ISO to use in a low-light situation. That ISO number will vary based on a number of parameters –
- The subject that you’re trying to photograph.
- The size of the sensor.
- The number of pixels on the sensor.
- The sensor architecture – BSI or otherwise.
- If the sensor is ISO invariant.
- If the sensor architecture comes with dual output gain.
A simple trial and error method to shoot with the best ISO for low light photography that your camera can handle is to find out that sweet spot where the camera produces the perfect balance of noise and detail in your images.
Start by shooting at ISO 100 and check the image quality. Then increase the ISO by one stop and retake the image to verify the noise and detail.
Learn post-processing and noise-reduction methods
Post-processing is an important aspect of photography. It’s the necessary culmination of the process of photography that starts from scouting a location and setting up the camera. Whatever you capture using your camera post-processing refines it and gives it a logical end.
Post-processing is the final step that brings a RAW image to match the photographer’s original vision. This is why it’s imperative that you spend some time understanding how to do image processing tastefully.
Noise reduction is an important aspect of post-processing. When done correctly, it allows you to suppress noise in your images while retaining details. You must strive to achieve this perfect balance – less noise and more details.
Photoshop, Lightroom, Luminar Neo, and Topaz AI are some of the best software you could use to work on the noise levels of your images. While Photoshop offers you a range of tools for general photo editing, Topaz AI and Luminar Neo offer some pretty advanced tools that take care of noise effortlessly.
Topaz Labs has this special Topaz DeNoise AI tool, and Luminar has this Noiseless AI tool (a Luminar Neo AI extension) that is extremely powerful and does a fantastic job. With Photoshop, there is a steep learning curve. But Topaz DeNoise and Luminar Neo Noiseless AI tools have a very little learning curve to talk about.

Final thoughts
We wrote this article to explain the relationship between light sensitivity, image quality, and noise control when it comes to ISO settings. As a photography review site, it is our duty to equip you, our readers, with the knowledge and tools needed to capture awe-inspiring moments even in the darkest of environments. We find many photographers, especially new to photography, struggle with this area.
It is worth noting that every camera has its own unique characteristics (old, new, DSLR, mirrorless etc) and technological advancements continue to redefine the boundaries of low light photography. Today’s cameras are equipped with sophisticated noise reduction algorithms and improved sensor capabilities, allowing photographers to venture into low light territories with confidence. When I pick up my father’s old camera and compare it with today’s features it is like looking at two different species!
We must always remember that photography is an art form not a science. ISO settings and equipment play a crucial role in helping navigate low light situations, it is ultimately your creative vision and unique perspectives that makes for great photos.
Let us know how you get on and as always we are keen to see your photos.