
I love a snowflake, not only does it remind me of crisp and cold weather, the beauty of them gives us photographers a good chance to take photographs of snowflakes of all shapes and sizes – but where do you begin capturing stunning macro photos of your own? What is the best way to capture the beauty of a tiny snowflake?
Over the years, I’ve photographed snowflakes. Here are the tips you need to capture photos that look just like mine:
- Setup for the perfect snowflake
- Sharpening and focusing an entire snowflake
- Snowflake photography: the best time to take pictures
Here are some tips and tricks for achieving great results. In this tutorial, you’ll learn how to properly photograph snowflakes and what equipment you should use.
Essential Equipment for Capturing Snowflakes
It’s necessary to assemble a the right equipment to photograph snowflakes.
Lenses and cameras
I highly recommend filling the frame, as snowflakes are approximately 2 mm to 5 mm across. The magnification will need to be powerful.
It doesn’t matter what kind of camera you have as long as it has interchangeable lenses. If you want to set your lens for magnification beyond 1:1, you will need one or more of the following:
- Focusing ratio of 2:1 (or greater) for macro lenses
- Extension tubes
- Filters for close-ups
If you choose any of these, be aware that most macro lenses do not reach 2:1 magnification; check the specs before buying (otherwise, you won’t be able to fill the frame).
It’s often possible to get close to 2:1 magnification when you use the extension tube option. A hollow extension tube sits between a camera and a lens, as shown below:
It’s a good idea to invest in close-up filters, which work like reading glasses for your camera. If you stack multiple filters together, the effect will be enhanced. The edges of the frame will get distorted by close-up filters, unlike extension tubes, but they are cheap, and you will probably crop out the edges anyhow when photographing snowflakes.
You’ll do your snowflake photography with manual focus, so you won’t have a problem with close-up filters interfering with autofocus capabilities.
Lighting
Snowflakes may seem difficult to light, but using a ring flash is actually pretty simple. As ring flashes mount directly to your lens, they don’t cast shadows on your subject, and they can be used to illuminate snowflakes artistically.
In most ring flashes (such as the Canon MR-14EX I use), you can make one bank of light brighter than the other. Using half the flash, I light each snowflake after dimming one bank. It is crucial to note that the angle of the camera makes a big difference, and getting the right angle can make a huge difference.
Below, I have compared two photos of snowflakes. Can you tell the difference? There was only a few degrees difference in the camera angle, but one snowflake looks milky and the other looks transparent.
Several experiments are needed to find the right angle, and I sometimes nudge the snowflakes with a paintbrush. As much as possible, I avoid manipulating the snow crystals since they often shatter.
The background
Depending on the background, you can photograph snowflakes in many different ways.
However, every single photo I have taken of snowflakes – including the one in this article – has a snowflake on it! The same black mittens are used for both. My setup would not be complete without it, for a number of reasons.
As a result, the mitten creates a stunning contrast between the snowflake and the dark background of the mitten. Also, the mitten offers insulation – ice gets entangled in the fibers and makes contact with the surface only at a few points, so the snowflake remains solid and little heat is transmitted.
As a final touch, the mitten serves as an instrument of isolation. There are woolen fibers in every shot, but these can be easily edited out as opposed to a flat and detailed surface like felt.
Conclusion: Put on a mitten! The color doesn’t have to be black, but I suggest sticking to dark colors (to maintain the contrast discussed above).
How to photograph snowflakes: Step By Step Guide
Snowflakes are a challenging subject to photograph, so I’ll explain the basics in this section.
Step 1: Select the right flakes
The first step is to wait until snow begins to fall.
Take your dark mitten outside and set it down. The mitten should not be worn because you do not want to facilitate the transfer of heat!
Take a closer look at the mitten once a few snowflakes land. The kind of snowfall you want is “beautiful,” not crystals encrusted with frozen water.
The types of snowflakes produced by different snowfalls will vary. If you want to photograph big, clean snowflakes with lots of branches, you’ll need to let your mitten sit out for a few snowfalls.
Photographing snowflakes during a snowfall is very important. Take pictures of the snowflakes as soon as you find the right ones. Await even an hour, and the crystal edges will quickly fade away as they melt or sublimate (evaporate without melting first).
Consider placing your mitten on freshly fallen snow, then picking it up again; you will be able to capture a few snowflakes before they deteriorate too much. This may be a good idea if you just missed the snowfall.
Step 2: Take a series of images for focus stacking
You must shoot with the goal of focus stacking your shots once you find the right snowfall and snowflakes.
In what sense am I referring to this? Stacking focus is the process of taking multiple pictures of a subject from different vantage points, then combining them in post-processing for a sharp final image.
You can then take a series of pictures of a snowflake by moving the camera forward and backward while firing off images. If you want to take multiple shots, it’s best to use burst mode; the key is to make sure as many parts of the snowflake are in focus as possible.
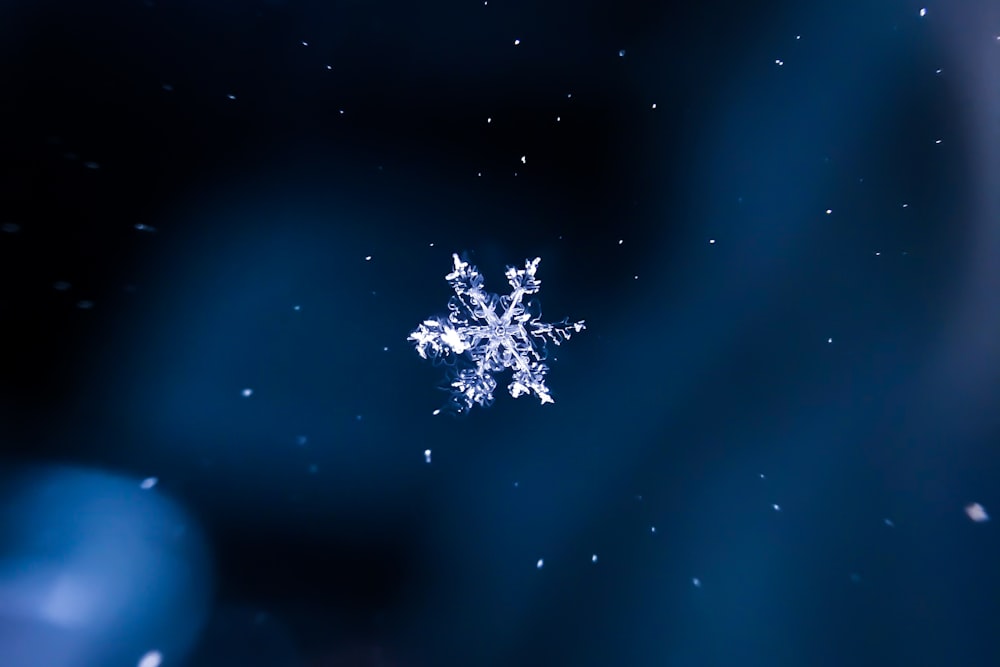
As you can see, when you magnify your snowflake so high, only a tiny sliver is in clear focus. This is an image of a single snowflake:
Once you’ve shot enough and stacked your focus, you’ll get time. The 33 frames I stacked were selected out of 112 overall, and I take far more frames than I’ll ever use!
Is there a reason why I don’t use a tripod? It takes quite some time to adjust a focusing rail and set up a tripod at exactly the right angle. My snowflake needs to be protected from melting, blowing away, or getting smothered by more falling snow. So long as the angle of the camera doesn’t vary too much between shots, Photoshop does a pretty good job realigning the files.
To achieve the desired reflection, I take test shots and adjust the angle of the camera to achieve the desired reflection rather than setting up a tripod.
A good tip is to take your photos at different angles. That way, you’ll capture surface reflections, prismatic colors, and even vibrant colors in the center.
Step 3: Process the files
Snowflake editing isn’t something I want to discuss too much. When it comes down to it, it’s one of the most routine and unoriginal parts of photographing snowflakes.
The first step in stacking your images is to stack them (you can use Photoshop for this or use a dedicated stacking program, such as Helicon Focus).
Stack your image and edit it as you would any other shot. The snowflake should be cropped to emphasize it, distractions should be removed (e.g., wool from the glove), and the exposure and contrast should be adjusted to bring out its details.
You’ll end up with a great outcome if you experiment and have fun.
What Else You Should Consider for Photographing Snowflakes
It is best to shoot snowflakes during a snowfall because they melt quickly or form a clump when frozen. The most beautiful snowflakes are those that have just fallen and are not damaged by wind.
Snowflake images require more than just technical preparation. Weather conditions are important, there will be a low temperature (freezing temperature!) outside when you work. Keep yourself warm by wearing proper clothing.
Moreover, batteries will run out faster in low temperatures. Keep more than one with you.
The warmth of your body and breath can melt the snowflake when you lean close to it to photograph it. Try not to blow or melt the snowflakes by paying attention to how you breathe for best results.
This video is worth watching this video by Don Komarechka who is known for his work with snowflakes.
Frequently Asked Questions
Can you tell me what equipment I need?
Invest in a quality DSLR or mirrorless camera with a macro lens if you want to capture stunning photos of snowflakes. Stability and control are enhanced with a tripod, lens hood, and remote shutter release.
Is it possible to photograph snowflakes with a smartphone?
Snowflake photography can be done with a smartphone attached to a macro lens, but smartphone cameras have their limitations. The results produced by a digital camera, however, are superior.
Is there a specific setting for each type of snowflake?
Depending on the size and structure of the snowflake, adjust your camera settings. Find the best shutter speed and aperture combination by experimenting.
What should I do if it is snowing outside?
When not in use, keep camera gear in a protective bag that is weather-proof. Snow and moisture can be prevented with the use of lens hoods and rain covers. Then go and build a snowman or have a snowball fight : )
Do you need a tripod to photograph snowflakes?
Especially in low-temperature conditions, a tripod is essential for stability. As a result, snowflake images are sharp and clear because camera shake is prevented by those cold shaking hands.
What can I do to prevent condensation on my camera lens?
Make sure your equipment is acclimated to the cold before using it. To capture crystal-clear snowflakes, wipe your lens or use a lens heater to prevent condensation. Always make sure you have the right lens for sharper images.
Final Thoughts
With the help of this article, you’ll now be able to capture some incredible snowflake photos for both amateur photographers and professionals. There is a real beauty of snowflakes, whether they are tiny snowflakes or large patterns formed on trees.
Take advantage of this opportunity by acquiring the necessary equipment and don’t forget to get outside when the colder temperature comes to catch the first photograph of a snowflake this season.